Chipboard is really a staple in my studio, I use it for so many things but I love it for masks, I ripped these two pieces and then laid them on top of my paper, I used 110# card stock, but anything that does not bleed heavily is fine and it is fun to play with a textured watercolor paper on something like this too. I laid them down to create a directional splatter diagonally across my sheet.
Here is the second go around, I am using a more concentrated mixture, less water more paint. Same tapping motion, I tap about 1 to 1 1/2" inches behind the ferrule crimp. I load my tempra into a porcelain washi bowl,I just use one but you might want to use two containers one for your first mix and one for the second thicker mix.
This little brush is one of my all time favorites and I guard it like a dog with a bone, lol, it came in an overnight kit and is a temporary tooth brush, it has very fine plastic bristles and is great at the end for tiny tiny little splatters, you can use a tooth brush but load it lightly. If you are not familiar with these processes, I really do suggest you play a little first to get your bearings.
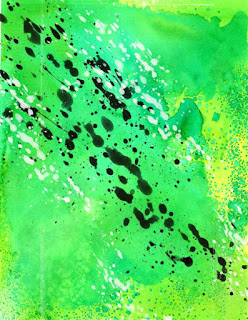
The above is the final splat, just waiting for the paint to dry, I usually give it 30mins or so its own and then hit with a heat or embossing tool. Then scan the piece in, take it to photoshop and create a brush.
.jpg)
This is how the brush created in PhotoShop looks on a piece of background paper, I used the brush in black and in white, I made the white splatters a little smaller for the white. Hope this helped, have a great weekend, hugs
.JPG)
.jpg)
.jpg)
.jpg)
.jpg)
.jpg)
7 comments:
Rockin' tutorial, Sandi! I would never have this much gumption, but should I ever decide to go splatter something I will definitely try this!!
Brilliant but holy cow! This is real life.
Very cool Sandi! ~Diane
oh my! sandi you just have the best ideas hun! I love this!! I will have to show mo because he would have too much fun splattering!!!
huge hugs Lou xxx
Great tutorial Sandi.Love how you layered the splattering.
Hugs
Jayne x
I'm totally going to try this! What a great idea - thanks for sharing!
Brilliant! Thank you.
Post a Comment